VIM + TMUX Setup tutorial
Overview: One way to use Konduktiva is with VIM and TMUX. This can act as your editor for Konduktiva.
About The Two Programs
Vim is a editor. Click here to learn more about it.
TMUX is a terminal multiplexer. We will use it to send code between terminal windows. Click here to learn more about it
Installation
VIM
If you are on Windows you will have to install VIM from the VIM website download page.
VIM comes with most UNIX based systems including MacOS.
TMUX
Install TMUX based on the install instructions for your system here
Check If Installed
VIM
Open a terminal window and type:
vim
If VIM has been installed correctly you should see something like this:
 To quit vim press these buttons. Do not type the plusses “+” but type the rest. No capital letters.
CTRL+ c + : + ! + q
To quit vim press these buttons. Do not type the plusses “+” but type the rest. No capital letters.
CTRL+ c + : + ! + q
More usage instructions about VIM will be given later.
TMUX
Open a terminal window and type:
tmux
If TMUX has been installed correctly you should see something like this:

Type this in the same terminal window to exit TMUX:
exit
More usage instructions about TMUX will be given later.
Configuration
A useful tool to automatically configure TMUX and VIM to work correctly for Konduktiva can be found on the Konduktiva Github.
DISCLAIMER: The tool will create a vimrc(vim configuration) file if it does not find one in your system and in the correct location. If it does find a vimrc file, it will bind shortcuts for vim to the buttons F3, F8,, F9, F11, <SPACE + ;>, <SPACE+ →, if it does not find anything bound to them. These configuration will be added to the very end of the vimrc file so they can be easily removed. The tool will also create a tslime.vim file in your plugins folder inside your vim folder if it does not detect one. The code could potentially have issue and may make breaking changes. If you choose to use the code, the author of the code is in no way responsible for anything caused by the code.
If you have read the disclaimer, here is the download to the code
After downloading the code, open a terminal window and navigate to the directory where you have installed the code. Here is a simple resource for navigating the terminal. After you have navigated using the terminal to the right place, run this:
node auto-configure-vim-tmux.js
Basic Usage Insturctions
VIM
If you have used the vim configuration file given you by the auto configuration tool, here are some useful shortcuts.
| Keys | Action |
|---|---|
| SPACE + S | Save and quit |
| SPACE + s | save |
| SPACE + Q | Quit without saving |
| SPACE + q | quit |
Here is some basic knowledge about vim: Press i to enter insert mode to start typing (insert mode) Press escape to get out of insert mode.
Type vimtutor to learn more about vim.
TMUX
Useful TMUX shortcuts:
| Keys | action | |
|---|---|---|
| CTRL + B + C | new pane | |
| CTRL + B + J | last pane | |
| CTRL + B + K | next pane |
Learn more about tmux here
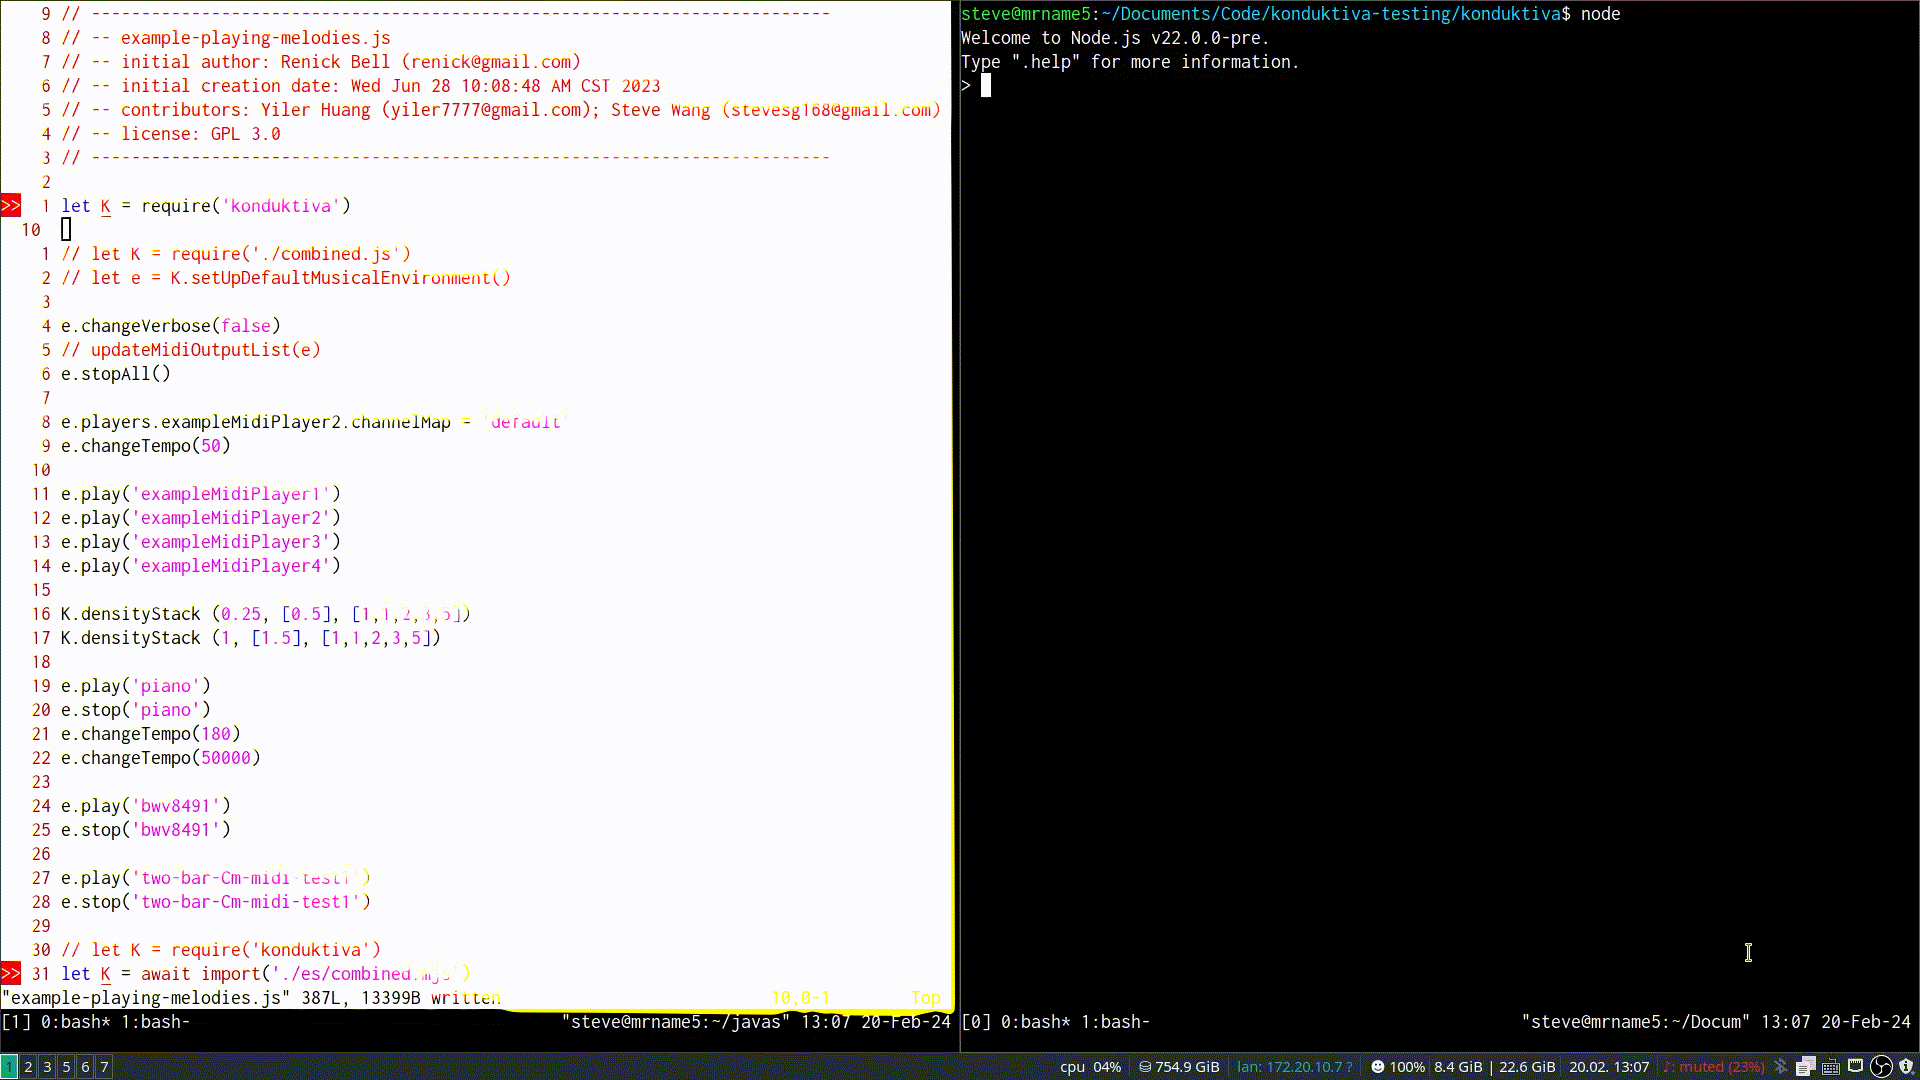
Working With Konduktiva
What I like to do is have two terminals side by side in half screen. Then, the two terminal windows will have TMUX running in them. My VIM editor will be on one side and nodejs with Konduktiva running in it will be on the right. Like so:

I can send things to Konduktiva from vim by pressing the enter key: